Part 1: The ‘@’ and the Dungeon Grid
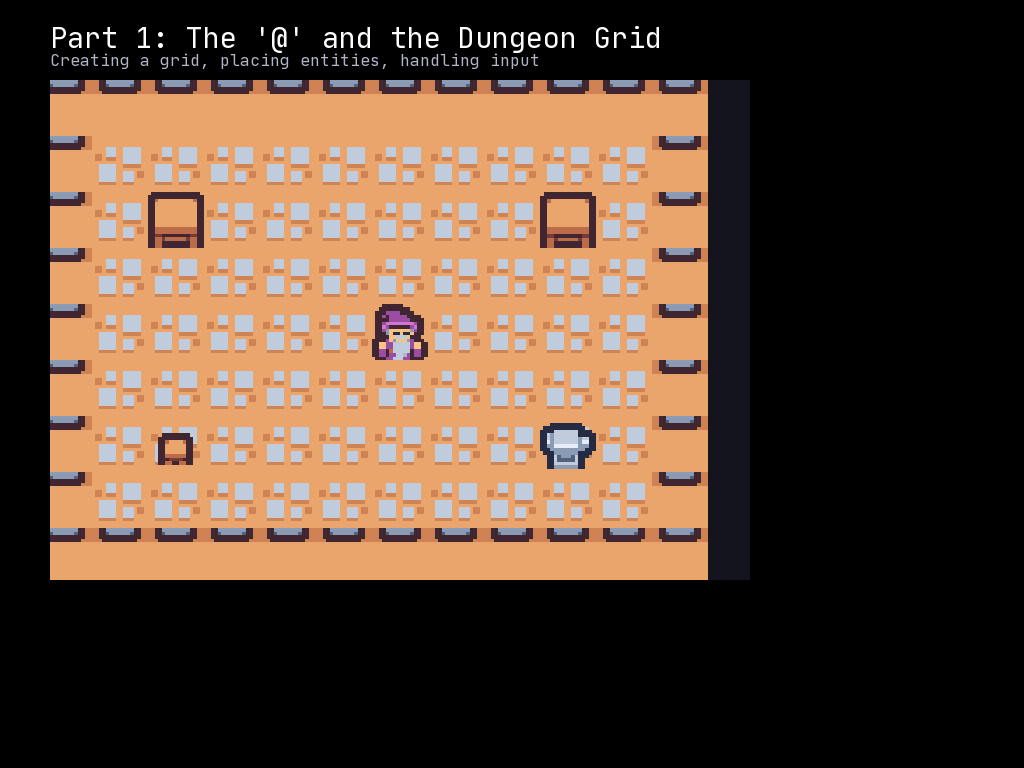
In this part, we will create a tile-based game world using a Grid, place a player Entity represented by the classic ‘@’ symbol, and handle keyboard input to move the player around.
What You Will Learn
- Creating a Grid for tile-based rendering
- Loading Textures for sprite graphics
- Placing an Entity on the Grid
- Handling keyboard input with
scene.on_key - Understanding grid coordinates vs. pixel coordinates
Sprite Indices and CP437
McRogueFace uses sprite sheets where each character maps to an index. If you use a CP437-style sprite sheet (like many roguelike tilesets), common characters map to their ASCII values:
# Common CP437 sprite indices
SPRITE_AT = 64      # '@' - the player
SPRITE_HASH = 35    # '#' - walls
SPRITE_PERIOD = 46  # '.' - floor
SPRITE_PLUS = 43    # '+' - door
The Complete Code
Create a file called part_01_grid_movement.py:
"""McRogueFace Tutorial - Part 1: The '@' and the Dungeon Grid

Learn to create a grid, place a player entity, and handle movement.
"""
import mcrfpy

# Sprite indices for CP437 tileset
SPRITE_AT = 64      # '@' - player character
SPRITE_FLOOR = 46   # '.' - floor tile

# Grid dimensions (in tiles)
GRID_WIDTH = 20
GRID_HEIGHT = 15

# Create the scene
scene = mcrfpy.Scene("game")

# Load the texture (sprite sheet)
# Parameters: path, sprite_width, sprite_height
texture = mcrfpy.Texture("assets/kenney_tinydungeon.png", 16, 16)

# Create the grid
# The grid displays tiles and contains entities
# Note: zoom must be set in the constructor to ensure correct initial camera position
grid = mcrfpy.Grid(
    pos=(100, 80),          # Position on screen (pixels)
    size=(640, 480),        # Display size (pixels)
    grid_size=(GRID_WIDTH, GRID_HEIGHT),  # Size in tiles
    texture=texture,
    zoom=2.0                # Zoom level (set here, not after, for correct camera!)
)

# Fill the grid with floor tiles
for y in range(GRID_HEIGHT):
    for x in range(GRID_WIDTH):
        cell = grid.at(x, y)
        cell.tilesprite = SPRITE_FLOOR

# Create the player entity at the center of the grid
player = mcrfpy.Entity(
    grid_pos=(GRID_WIDTH // 2, GRID_HEIGHT // 2),  # Grid coordinates, not pixels!
    texture=texture,
    sprite_index=SPRITE_AT
)

# Add the player to the grid
# Option 1: Use the grid parameter in constructor
# player = mcrfpy.Entity(grid_pos=(10, 7), texture=texture, sprite_index=SPRITE_AT, grid=grid)

# Option 2: Append to grid.entities (what we will use)
grid.entities.append(player)

# Add the grid to the scene
scene.children.append(grid)

# Add a title caption
title = mcrfpy.Caption(
    pos=(100, 20),
    text="Part 1: Grid Movement - Use Arrow Keys or WASD"
)
title.fill_color = mcrfpy.Color(255, 255, 255)
title.font_size = 18
scene.children.append(title)

# Add a position display
pos_display = mcrfpy.Caption(
    pos=(100, 50),
    text=f"Player Position: ({player.grid_x}, {player.grid_y})"
)
pos_display.fill_color = mcrfpy.Color(200, 200, 100)
pos_display.font_size = 16
scene.children.append(pos_display)

def handle_keys(key: mcrfpy.Key, action: mcrfpy.InputState) -> None:
    """Handle keyboard input to move the player.

    Args:
        key: The mcrfpy.Key enum value that was pressed
        action: mcrfpy.InputState.PRESSED or mcrfpy.InputState.RELEASED
    """
    # Only respond to key press, not release
    if action != mcrfpy.InputState.PRESSED:
        return

    # Get current player position
    px, py = player.grid_x, player.grid_y

    # Calculate new position based on key
    if key == mcrfpy.Key.W or key == mcrfpy.Key.UP:
        py -= 1  # Up decreases Y
    elif key == mcrfpy.Key.S or key == mcrfpy.Key.DOWN:
        py += 1  # Down increases Y
    elif key == mcrfpy.Key.A or key == mcrfpy.Key.LEFT:
        px -= 1  # Left decreases X
    elif key == mcrfpy.Key.D or key == mcrfpy.Key.RIGHT:
        px += 1  # Right increases X
    elif key == mcrfpy.Key.ESCAPE:
        mcrfpy.exit()
        return

    # Update player position
    player.grid_x = px
    player.grid_y = py

    # Update the position display
    pos_display.text = f"Player Position: ({player.grid_x}, {player.grid_y})"

# Set the key handler on the scene
# This is the preferred approach - works on ANY scene, not just the active one
scene.on_key = handle_keys

# Activate the scene
scene.activate()

print("Part 1 loaded! Use WASD or Arrow keys to move.")
Understanding the Code
Loading a Texture
texture = mcrfpy.Texture("assets/kenney_tinydungeon.png", 16, 16)
A Texture is a sprite sheet - an image containing multiple sprites arranged in a grid. The parameters specify:
- The path to the image file
- The width and height of each sprite (16x16 pixels in this case)
The texture divides the image into cells, numbered from 0 starting at the top-left.
Creating a Grid
grid = mcrfpy.Grid(
    pos=(100, 80),
    size=(640, 480),
    grid_size=(GRID_WIDTH, GRID_HEIGHT),
    texture=texture,
    zoom=2.0
)
The Grid is your game world container. Key parameters:
pos: Where to draw the grid on screen (in pixels)size: How large to draw the grid (in pixels)grid_size: The number of tiles (width, height)texture: The sprite sheet to use for tiles and entitieszoom: Magnification level (important: set in constructor for correct camera position!)
Two Coordinate Systems
McRogueFace uses two coordinate systems:
- Pixel coordinates: Used for screen position (
pos,size) - Grid coordinates: Used for tile and entity positions
# Grid position in pixels - where it appears on screen
grid.pos = (100, 80)

# Entity position in tiles - where it sits in the grid
player.grid_x = 10  # 10th column
player.grid_y = 7   # 7th row
Note: Entity.x/Entity.y are pixel coordinates (the entity’s drawn position), separate from Entity.grid_x/Entity.grid_y, which are the logical tile coordinates used above.
Accessing Grid Cells
cell = grid.at(x, y)
cell.tilesprite = SPRITE_FLOOR
Use grid.at(x, y) to get a GridPoint representing a single cell. You can then set:
tilesprite: Which sprite index to displaywalkable: Whether entities can move through this cell (used in Part 2)transparent: Whether this cell blocks line of sight (used in Part 4)
Creating an Entity
player = mcrfpy.Entity(
    grid_pos=(GRID_WIDTH // 2, GRID_HEIGHT // 2),
    texture=texture,
    sprite_index=SPRITE_AT
)
grid.entities.append(player)
An Entity is a game object that exists on a grid. Unlike tiles, entities can move. The pos parameter uses grid coordinates, not pixels.
Handling Keyboard Input
def handle_keys(key: mcrfpy.Key, action: mcrfpy.InputState) -> None:
    if action != mcrfpy.InputState.PRESSED:
        return
    # ... handle movement ...

scene.on_key = handle_keys
The key handler receives two arguments:
key: Anmcrfpy.Keyenum value identifying the key (e.g.mcrfpy.Key.W,mcrfpy.Key.UP,mcrfpy.Key.ESCAPE)action: Anmcrfpy.InputStateenum value, eitherPRESSED(key pressed) orRELEASED(key released)
Setting scene.on_key is the standard approach because:
- It can be set on ANY scene, not just the active one
- It keeps the handler associated with its scene object
Grid Coordinate System
In McRogueFace (and most 2D games):
     X increases -->
   +---+---+---+---+---+
Y  | 0 | 1 | 2 | 3 | 4 |  y=0
|  +---+---+---+---+---+
i  | 0 | 1 | 2 | 3 | 4 |  y=1
n  +---+---+---+---+---+
c  | 0 | 1 | 2 | 3 | 4 |  y=2
r  +---+---+---+---+---+
e
a
s
e
s
- X increases to the right (0 is left edge)
- Y increases downward (0 is top edge)
- This matches how screen coordinates work
So when the player presses “Up”, we decrease Y. When they press “Down”, we increase Y.
Current Limitation: No Boundaries
Right now, the player can walk off the edge of the grid! The position will go negative or exceed the grid size. We will fix this in Part 2 by adding collision detection.
Try This
- Change the player sprite: Try
SPRITE_AT = 1or other indices to see different characters - Change grid size: Make a larger or smaller dungeon
- Add more entities: Create a second Entity for an NPC
- Display more info: Show the grid size in another Caption
- Experiment with zoom: Try
grid.zoom = 1.0orgrid.zoom = 3.0
What is Next
In Part 2, we will add walls and collision detection. You will learn:
- How to define different tile types (walls vs floors)
- How to check
GridPoint.walkablebefore moving - How to create a simple map with boundaries
- Why tile properties matter for game logic